3D Printed Tiny Sea Creatures
I hack in Microsoft’s Maker Garage whenever I can. The Maker Garage is a relatively new addition to The Garage, which you may already be familiar with. The Maker Garage is a space where Microsoft Employees can come build things - hardware things, electronic things, software things, any things.
I’m a recent convert to the hardware side. I studied a bit of both hardware and software in my undergraduate Computer Engineering course many years ago, but it’s been almost entirely software for me since then. This return to resistors, capacitors and NPN transistors is a lot of fun, and in my role as a Developer Evangelist at Microsoft, it’s excellent for engaging with beginners, young folks, and anyone looking for a bit of a change from the sometimes humdrum enterprise app engineering space (hand raised!).
My last project in the Maker Garage was not a typical Azure-backed, IoT project, however. This time the customer was my 3 year old son. My wife notified me that we needed some random little figurines to complete a birthday gift, and why should we mail order figurines from across the globe when we can print them?! That’s right… no good reason.
There are a number of 3D printers in the Maker Garage, but the most recent adoption is a Form 1+ lithographic printer by FormLabs.
I first learned about the Form 1 watching the Netflix special Print the Legend some weeks ago. If you have a Netflix subscription, I recommend the documentary.
The Form 1 does not use the more popular filament extrusion technique employed by most of the 3D printers you see in the headlines. Instead, it uses stereolithography. Instead of melting plastic filament and shooting it out of a nozzle, a stereolithographic printer builds your model in a pool of liquid resin. The resin is photo-reactive and cures when exposed to a UV laser. This means you can shoot a tiny spot in the resin and it will harden. That’s perfect for turning goo into a ‘thing’.
The ‘things’ I decided to print were sea creatures. My son likes them, and they’re easy to find on Thingiverse.
I found an octopus, a submarine (not a creature I understand), a crab, a ray, an angler fish, a seahorse, and a whale.
Here’s the model of the octopus opened in 3D Builder that comes with Windows - a very slick touch-smart 3D model viewer, editor, and printer driver…
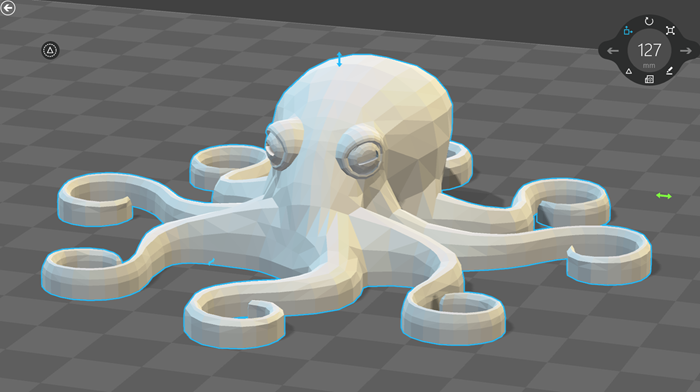
You could intuit even if you didn’t know that 3D models, like 2D vector graphics, can be scale to most any size, but unlike 2D vector graphics, they don’t always maintain their fidelity. 2D vector graphics tend to fully describe shapes. A circle is described as a circle that renders fine when you set its diameter to a millimeter or a kilometer.
3D models in .stl format - the common format for 3D printers - on the other hand are meshes. These meshes can lose their fidelity when you scale your model up. In my case here, though, I’m scaling these guys way down, so quality is not a problem.
I use Autodesk Fusion 360 for my modeling, but in this case I was able to import the .stl files directly into the software FormLabs ships with the printer. It’s the best printer driver software I’ve seen yet from a manufacturer and allowed me to scale, orient, layout, and print all seven of my characters with no trouble at all. I wish I had a screen shot of the layout just before I hit print, but I didn’t save that.
I scaled each character to somewhere between .75” and 1” on its longest axis.
You have a chance to choose the resolution of your print, and your decision has a linear impact on the print time. I chose .1mm layers at an estimated 1 hour print instead of upgrading to .05mm and adding another hour.
And here are my results.

I was impressed.
Take a look at a closeup of the whale…
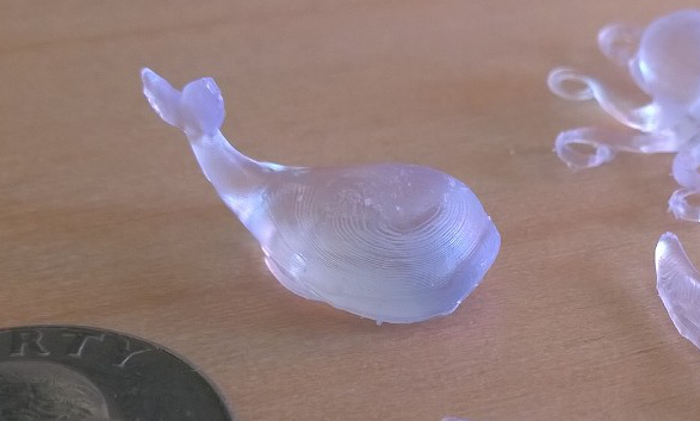
You can see the layering. That’s quite fine, and as I mentioned, it could have been double that had I had more patience.
The piece that really impressed me was the tiny seahorse…
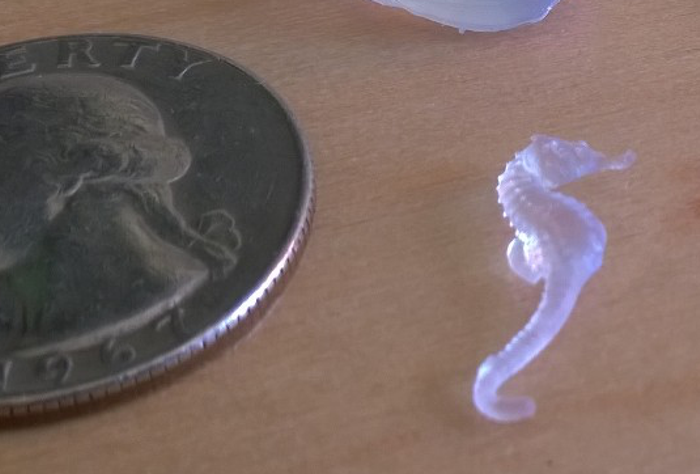
That’s just an itty bitty piece and it’s looking so smooth and detailed. Check out the small snout, dorsel fin, and tail. The same is true with the octopus legs.
One of my favorite things about the output of a lithographic printer is the transparent material. I much prefer a transparent, color-agnostic piece to the often random filament color that you end up with in community 3D printers. You can get tinted resin for the lithographic printers too, but the results are still models that are at least translucent.
I hope you enjoy this report out. Feel free to add suggestions or questions in the comments section below.