Extending that Splash Screen
I’m hard at work updating codeShow for Windows 8.1. I could have simply migrated my code from Windows 8 and tweaked it here and there, but in typical fashion, I decided to start from scratch. The open source codeShow project is intended as an instrument of learning and that’s exactly what I end up doing as I work on it… learning.
Since the start of codeShow, the number of demos has continued to grow and the amount of time it takes to load up all of those demos when the app is launched has been increasing. It’s actually quite a lot of file fetching and parsing that has to happen, so it’s perfectly reasonable that it would take some time.
So I started to get a little annoyed that the hub page was showing up blank and then taking a couple of seconds to bring in the data. So I set out to fix it.
I knew the answer was to create an extended splash screen, but I had not yet taken the time to learn how this is done.
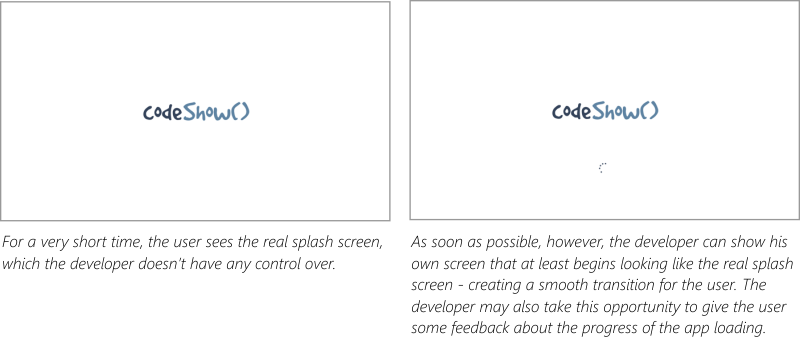
In case you’re not familiar, an extended splash screen is a technique for indicating to the user that some time is needed at the launch of the app. This is done by showing the app’s splash screen immediately after the app is loaded (so the user doesn’t even notice the transition), but adding progress indication of some kind. The real splash screen then only appears to the user for short time and then they begin to receive some feedback about how things are loading.
It’s ideal if you can get a user into your app right away, but if an essential element of your app (such as the demos in codeShow) are not available immediately, then the next best option is an extended splash screen.
The MSDN samples were helpful, but I felt a bit lost in the code. It seemed there was a lot of framework and superfluous code that may be necessary in a thorough study of a subject, but not necessarily for a simple and specific solution. So I set out to make the simplest extended splash screen solution that I could.
You can my entire solution in the codeShow project at codeshow.codeplex.com, and here it is…
First, I had to put a splash screen and progress indicator in my default.html file.
<div id="splash" class="hidden">
  <img src="/images/splashscreen.png" alt="Splash screen image" />
  <progress class="win-medium win-ring"></progress>
</div>
Then the positionSplashScreen function does most of the work. The function refers to the splash div by its id (notice that for the Trident engine that runs Windows 8 apps it’s not necessary to locate the element using getElementById). Then I query the args.detail.splashScreen to get it’s location and use that to set the location of my splash screen. Finally I set a margin for the progress indicator to get it where I want it.
function postitionSplashScreen(args) {
  var i = splash.querySelector("img");
  var p = splash.querySelector("progress");
  var ss = args.detail.splashScreen;
  splash.classList.remove("hidden");
  i.style.top = ss.imageLocation.y + "px";
  i.style.left = ss.imageLocation.x + "px";
  i.style.height = ss.imageLocation.height + "px";
  i.style.width = ss.imageLocation.width + "px";
  p.style.marginTop = ss.imageLocation.y + ss.imageLocation.height + 32 + "px";
}
And that’s almost all there is to it. If we stopped there, however, the splash screen would forever show and hide our beautiful hub page underneath.
So all we need to do is determine when all of the data that makes up the hub have finished loading and we can hide the splash screen. Here’s what that looks like…
Data.loaded
  .then(function () {
    splash.classList.add("hidden");
  });
The logic that I use to determine the Data.loaded variable (another Promise) is for another post entirely, but when it has been loaded, we simply add the “hidden” class to the class list of the splash screen and the whole thing disappears and reveals a completely loaded hub beneath.
That’s it for now. Hope it helps. Leave me a comment if you have any questions about this technique.