Wifi on the Command Line on a Raspberry Pi
I hate hooking a monitor up to my Raspberry Pi. It feels wrong. It feels like I should be able to do everything from the command line, and the fact is I can.
If you’re pulling your Raspberry Pi out of the box and are interested in bootstrapping without a monitor, check out my other post on Easy and Offline Connection to your Raspberry Pi.
Afterward, you may want to set up your wifi access - that is, you want to tell your pi about the wireless access points at your home, your coffee shop, or whatever.
Doing that from the command line is pretty easy, so this will be short.
You’re going to be using a utility on Raspbian called wpa_cli. This handles wireless configuration and writes its configuration into /etc/wpa_supplicant/wpa_supplicant.conf. You could even just edit that file directly, but now we’re talking crazy talk. Actually, I do that sometimes, but whatever.
First, run…
wpa_cli status…to see what the current status is. If you get Failed to connect to non-global ctrl_ifname: (null) error: No such file or directory, that’s just a ridiculously cryptic error message that means you don’t have a wifi dongle. Why they couldn’t just say “you don’t have a wifi dongle” I don’t know, but whatever.
If you do have a wifi dongle, you’ll instead see something like…
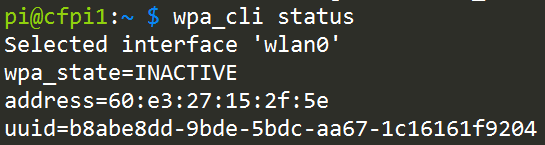
Yay! You have a wireless adapter, which means you likely have a wifi dongle plugged into a USB port. It says here that the current state is INACTIVE. That’s because you’re not connected to any access points.
To do so, you need to run scan, but at this point, you may want to enter the wpa_cli interactive mode. That means that you don’t have to keep prefixing your commands with wpa_cli, but can instead just type the commands. To enter interactive mode, just do…
wpa_cliTo get out at any time just type quit <enter>.
Now do a scan using…
scanIt’s funny, because it appears that nothing happened, but it did. Use…
scan_results…to see what it found.
This scanning step is not necessary, by the way, there’s a good chance you already know the name (SSID) of your access point, and in that case you don’t need to do this.
Next you create a new network using…
add_networkYou’ll get an integer in return. If it’s your first network, you’ll get a 0. That’s the ID of the new network you just created, and you’ll use it on these subsequent commands.
To configure your network do this…
set_network 0 ssid "mynetwork"
set_network 0 psk "mypassword"
Something I read online said that as soon as you enter this, it would start connecting, but I had to also do this to get it to connect…
select_network 0Now there’s one more thing. If you’re like me, you don’t just connect to a single AP. I connect from home, my mifi, my local coffee shop, from work, etc. I want my pi to be able to connect from any and all of those networks.
Adding more networks is as easy as following the instructions above multiple times, but you want to set one more network property - the priority. The priority property takes an integer value and higher numbers are higher priority. That means that if I have network1 (priority 1) and network2 (priority 2), and when my pi boots it sees both of those networks, it’s going to choose to connect to network2 first because it has the higher priority.
Okay, that does it.
If you want to see everything I’ve written about the Raspberry Pi, check out codefoster.com/pi