Posts tagged with "art"
Acquiring Images Without Committing Plagiarism
The easiest way to find the image you’re looking for is a Bing/Google image search.
Did you know, though, that Bing and Google (and likely the other players) actually do their best to index the licenses associated with the images they crawl?
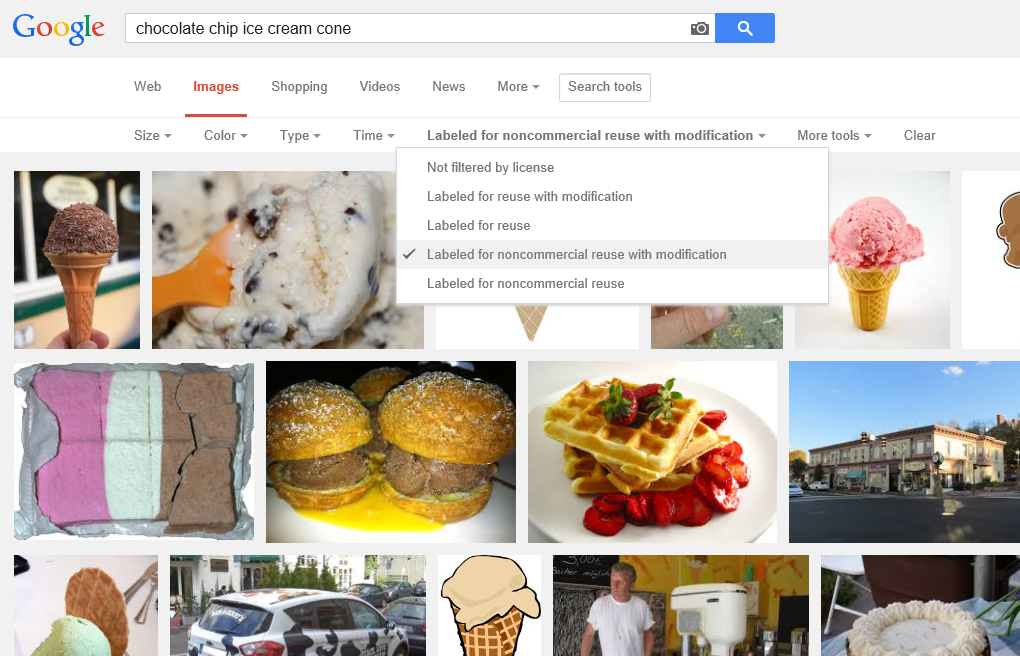
In a Google Images search, you perform a search and then hit Search Tools and then drop down the Usage Rights. As to why Google gives us astronaut Neapolitan and strawberry waffles… well, I can’t speak to that, but I’m sure those algorithms are really hard to write so we should have grace.
In a Bing Images search, you perform your search and then drop down the License list.
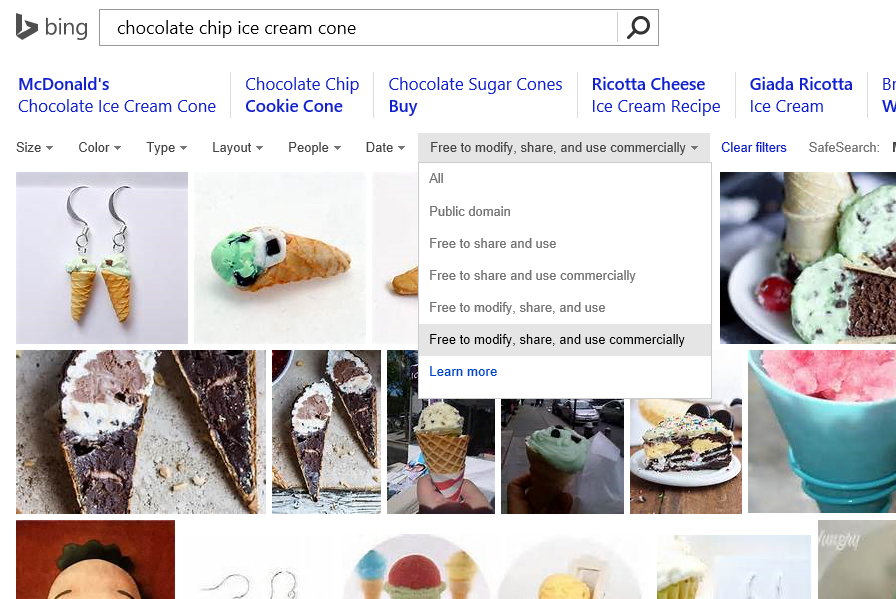
In either case, your search results are going to be severely limited, but you’re going to be able to sleep well at night knowing that you didn’t just rip an image off of someone’s site without a second thought only to reproduce it on your own and in the process breaking the law, ruining your name, and on and on.
I would imagine that this sort of search filter is highly dependent on the presence of some good metadata, so in order to be on the safe side, I still recommend you click through to the site where the image was found and do the leg work to figure out if it’s really in the public domain.
CorelDRAW App Tile Template
In case you haven’t heard, Microsoft has an incentive [link removed] going on right now where any app you create, you can get $100 for. That’s not bad considering how easy it is to make an app. Well, not all apps are easy. Some apps take quite a substantial bit of time, but if you’re just trying to get a good app into the Windows Store quickly (like say for $100!) there are some tricks you should know. There’s a template at w8templates.codeplex.com, for instance, that you can customize with a few search terms and RSS feeds and in a matter of minutes, you’ve got a data and media rich app all about the topic of your choice.
I just made an app using this template. It’s called The Sailing App. One of the tasks you’ll have to complete if you go down this road is to create your own graphics for the app tiles, splash screen, etc. Well, I don’t know about you, but I’m a big fan of CorelDRAW, so I made a template and I’m posting it here for you. By the way, if you’d like your very own free copy of CorelDRAW X6 Essentials, just join a ZERO260 event [link removed]. We’re giving them away.
Here’s that template. Have fun!
App Art
One of my favorite steps in the app development lifecycle is the creation of the artwork. I’m not stellar at creating original artwork, but I definitely recognize when things look just right, and sometimes I stumble upon it. I must also have a little bit of marketing in me, because it’s my constant effort to brand things.
The artwork and branding is important, because an app developer must live in a constant state of capturing the user amid so much noise. An app needs to say “here’s precisely what I do and how it adds value to your life”. It takes a lot of design thought and effort to cut through the noise and reach your audience.
Good messages to communicate are: clean, simple, creative, elegant, and fluid.
I’d like to walk you through my process of creating artwork for an app called Everyview. Everyview is webcam viewer that attempts to implement well the design principles of Windows 8. It’s intended to feel like a breath of fresh air. There are plenty of apps for viewing web cams and it’s nothing that can’t be done in the browser too, but it’s seldom a consolidated and elegant experience. As of this writing, Everyview is not yet published to the Windows Store, but by the time you read it, it may be. Try searching for Everyview.
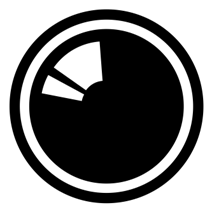
My artwork for Everyview started with the creation of a symbol. The symbol had to represent every image that could possibly come through the eye of a camera and so I simply chose to represent the eye of a camera. I didn’t want to make the app subject to aging by choosing a specific camera though, and I didn’t want to specify a still camera or a video camera. So I created a camera lens. The icon doesn’t determine absolutely that you’re looking down the barrel of a DSLR, an amateur video camera, a high-end video camera, or any other specific model. It’s an agnostic character of a camera.
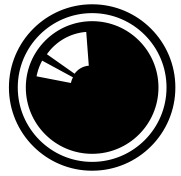
Looking into the eye of a camera invokes a bit of a “live” feeling, as if you’re on the air. I chose not to embellish the icon with a lot of gradients and or other attempts to make it look more realistic. As long as it says “camera” to the user, that’s enough. I did, however, ad a lens glare that identifies it without doubt as a camera lens.
Let me show you how I created this image.
I used CorelDRAW because… well, because I always use CorelDRAW. Use your graphics package of choice, but don’t restrict yourself to a bitmap editor. Creating images in a vector-based graphics package has serious benefits and will make exporting to the various required app graphic sizes a breeze. Creating images in a bitmap package will inevitable find you needing a size larger than what you designed for. I recorded a primer on using CorelDRAW and you can access it at http://aka.ms/coreldrawprimer.
Before I show you how I created that image, let me show you how I set up CorelDRAW for creating images for Windows 8. Choosing File | New in CorelDRAW by default will start you out with a document the size of a piece of paper. CorelDRAW is very good at creating artwork for print, but we’re concerned here more with pixels than we are with inches, so let’s change the defaults and save it for future use.
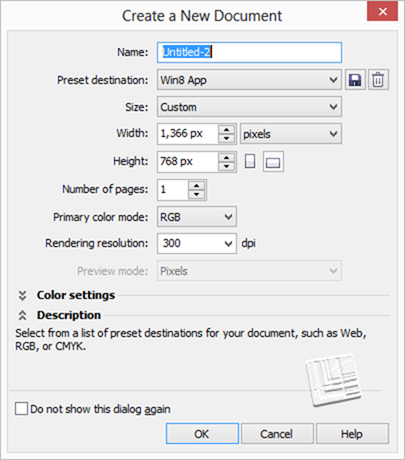
I created a preset called Win8 App that uses the base Windows resolution of 1366 x 768 pixels. I also chose a color mode of RGB since the results are to be rendered to a screen rather than a printer. When you’re working with documents of a designated pixel width/height, the resolution I mostly irrelevant.
If you’d like a nice place to start, try downloading the template I created at /w8tiletemplate.
Now, with a new document, we can go about creating our camera lens graphic.
Creating the lens graphic
Create a series of concentric circles like so. You do this by creating the largest and then resizing it with the CTRL key held to resize about the object’s center and hitting the right mouse button when you have your next circle to create a copy.
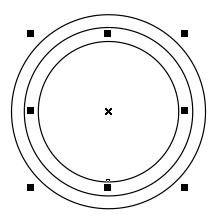
Use the second largest to trim the largest by clicking first the second largest and then holding shift and clicking the largest. Then hit the trim button  on the toolbar. Then delete the second largest circle. Setting the fill color of all objects to black and removing the outline color should leave you with something like this…
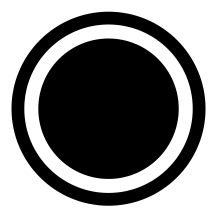
That’s nice and simple and we have only to create the lens glare, which is only slightly harder than what we’ve done so far.
Make another couple of circles inside the smallest. I like to give them a red outline (right click on red from the color palette) while I’m working so they’re easily discerned.
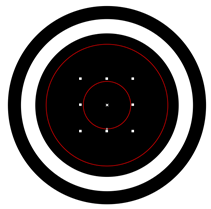
When you draw an ellipse (in this case a circular ellipse) in CorelDRAW, you have an ellipse, which is different from a custom curve. Ellipses have the property that you can grab their little vertex using the shape tool and drag to reduce the ellipse to an arc. Use the shape tool (F10) to do just that and work your way to something like this…
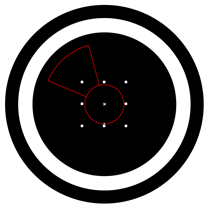
And then use some trimming and intersecting to end up with this…
Designing the tiles
Now it’s time to design yourself some tiles. At a minimum, you’ll need a standard app tile (150 x 150), a small logo (30 x 30), a store logo (50 x 50), and a splash screen (620 x 300). Additionally, you can design a wide logo (310 x 150) and some additional promotional images in case the Store finds your app worthy of being featured. It’s recommended that the wide logo only be used if you’re going to implement a live tile.
Let’s start with the main app tile. Here’s what I came up with for that…

Obviously, the tile incorporates the symbol we just created, but I also add a stylized app title below that. I chose a fairly bold font, condensed it, used different colors for the words and even shoved them together and created a little notch. Little design choices like this are somewhat arbitrary, but will end up becoming your brand and how people recognize your app. Finally, I added a soft gradient behind the entire title. You have to be careful with gradients in modern apps, but a shallow, gray gradient here seems to add a sort of dreamy, modern, cloud feel to the app.
Next, I’ll elaborate a bit on the standard logo design when creating the wide logo and the splash screen which I tend to make rather similar. Here’s what I came up with.

Now with more horizontal space than vertical, we stretch the brand elements out left to right and I like to add a little subtitle that describes without a doubt what the purpose of the app is - it’s a webcam viewer. Like the notched v in view, I notch the E with the camera lens and keep all of the graphics tight and bold.
The last step is the creation of the store and small logos.
The Store logo
The store logo is used for your apps dedicated detail page in the Windows Store. It’s common practice to just shrink the app tile down from 150 pixels to 50 and call it good, but that’s unfortunate because it’s rare that the app’s main tile will look so good at this size. Take a look at the Bing app’s Store logo captured from its page in the Store…
You want this image to be even simpler than the main app tile, to use most of the 50 x 50 pixel space, and to have a transparent background.
For my Everyview app, I stuck to the basic, original symbol. In CorelDRAW if you want to render something out a certain size even if the elements inside don’t quite fill up that size, you just create a bounding rectangle the size you want and then give it no fill and no outline. I have rendered this bounding box orange below for visibility only. To export this image, you simple set the bounding box’s outline color to none (invisible), select the entire group (bounding box and symbol together), and then export (CTRL + E) it.

Here’s how that would be rendered, however.
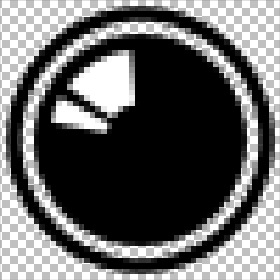
Notice a few things about this:
- The image has been rendered to pixels custom made for the export size chosen (it could be rendered absolutely huge and would still look great)
- The bounding box is not visible, yet it is responsible for the overall size and shape of the exported image
- The background is transparent (designated by the checkerboard pattern) but the lens glare is always white
- The transparency is 24-bit which means it has various levels of transparency around the edges to make it blend perfectly with the background
- There is a little bit of space around each edge of the symbol
- The symbol is large enough to capture all the quality we can in this restricted space
The small logo
The small logo is used to represent your app when the user semantically zooms out of their start screen. Try it and see.
You can use the exact same techniques to create the small logo as you did for the Store logo. The small logo (30 x 30 pixels) is even smaller than the store logo (50 x 50 pixels) so it becomes that much more important to be intentional about simplifying your image.
That’s as far as I’ll take this for now. Of course, you would continue your design effort into the app itself so that the entire effort is unified and consistent.
I’d like to point out one of the advantages to Microsoft design principles that ends up being highlighted by the content of this article. No part of the splash screen or the tiles or even the app itself are contributed to by Windows. The entire space falls under the responsibility of whoever wears the design hat in your organization (even if you are your organization and you wear all the hats!). The app tiles as well as the app’s main design surface because a truly empty canvas and 100% of the pixels are there to deliver your brand, deliver your functionality, and delight your user.
Have fun with this. It’s fun stuff for sure.
The Counter Principles of Metro Style Design
Likely you’ve read the Metro style design principles, but you haven’t seen the counter principles yet (because I made them up). Here we go…
1. Show Shame in Mediocrity
To really show shame in mediocrity, just look at about 80% of the apps in any major app marketplace. These apps may get a users attention with a catchy title or a promise to solve some problem, but then they fail to add any value to anyones life. Even if they are not devoid of functional value they fail to provide any user joy.
- Ignore the little things
- Do something different in every little user interaction so you can keep them on their toes
- Embrace chaos
- Deviate slightly from the grid so the user knows something is wrong even though that can’t see it
2. Flow Like Peanut Butter
To be clear, peanut butter doesn’t flow. Even creamy peanut butter doesn’t flow. To meet this counter principle, perform actions synchronously, use while loops that peg the processor, and only use the UI thread.
- Add some offset between the user’s finger and the registered touch point
- No transitions or animations… all straight cuts
- Add boring graphics and boring interactions.
- Embrace lag and jitters
3. Be Faux Analog
It’s 2012, but give the user a solid 1994 experience by rendering an actual real-life scene and hope they’ll figure out which drawer their word processor is in. Even though there’s no actual need for a spiral binding, let’s add one. It’s nostalgic.
- Show a desk or a lobby or some other loose analogy to your navigation model
- Firmly draw your limits at real life paradigms and scenarios
- Expand on the success of Microsoft Bob©
4. Do Less With More
Pack that screen. You have millions of pixels at your disposal. You can use some for navigation, some for commanding, and if there’s room left over you can even include your user’s content.
- Assure that users can orient themselves to your views within 7.5 minutes
- Adhere to a strict 45 button limit per view
- Give users a sense of adventure as they discover your application
5. Die Alone
- Assume the user is only concerned with doing whatever it is that your app does.
- Assume they don’t have friends to share your content with.
- Assume they don’t need to find anything of your content
- Assume the user what’s to do one thing at a time… always… ever… only