Posts tagged with "developer tools"
The Azure CLI
At the time of this writing, there are two Azure portals you can use.
To get to the main, full-featured, current Azure portal, you browse to manage.windowsazure.com in any modern browser, and it looks like this…
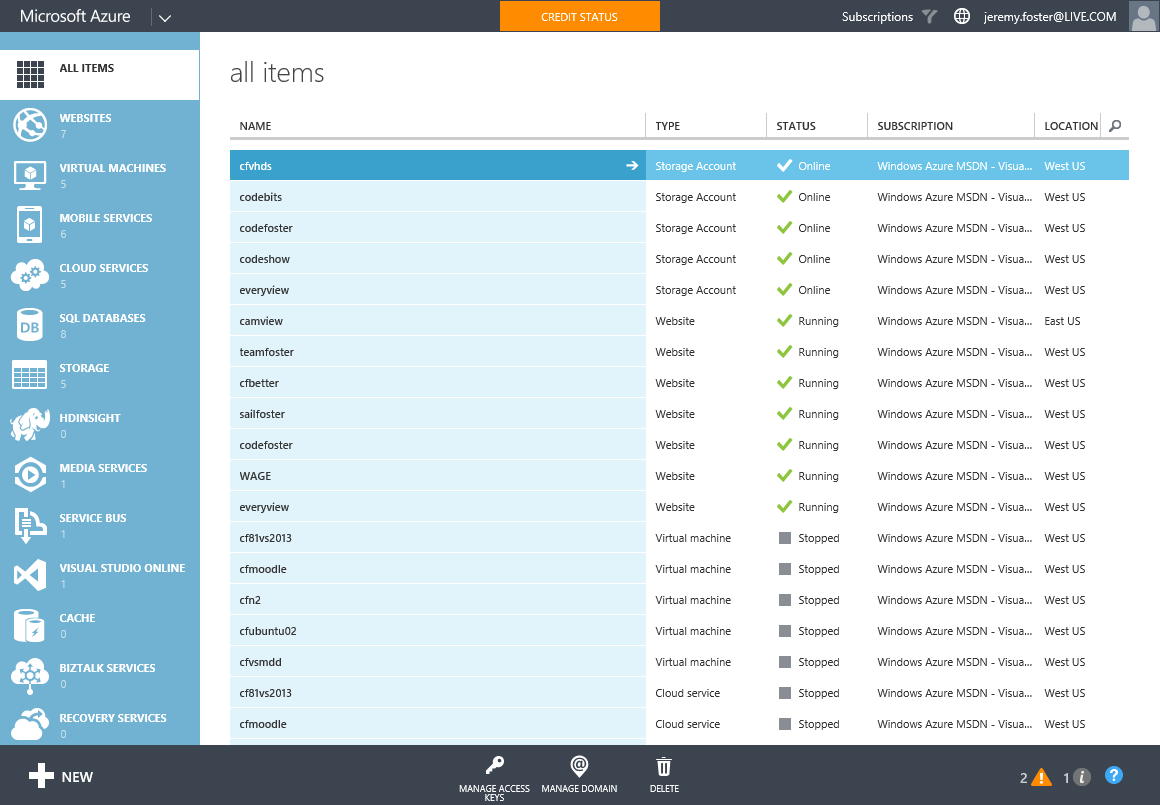
The new portal is already available for you to play with and get familiar with, and it’s a good thing too since it takes quite a bit of getting used to. Once you grok it, though, I’m pretty sure you’ll like it better. You get to the new portal by browsing to portal.azure.com. Here’s what it looks like…
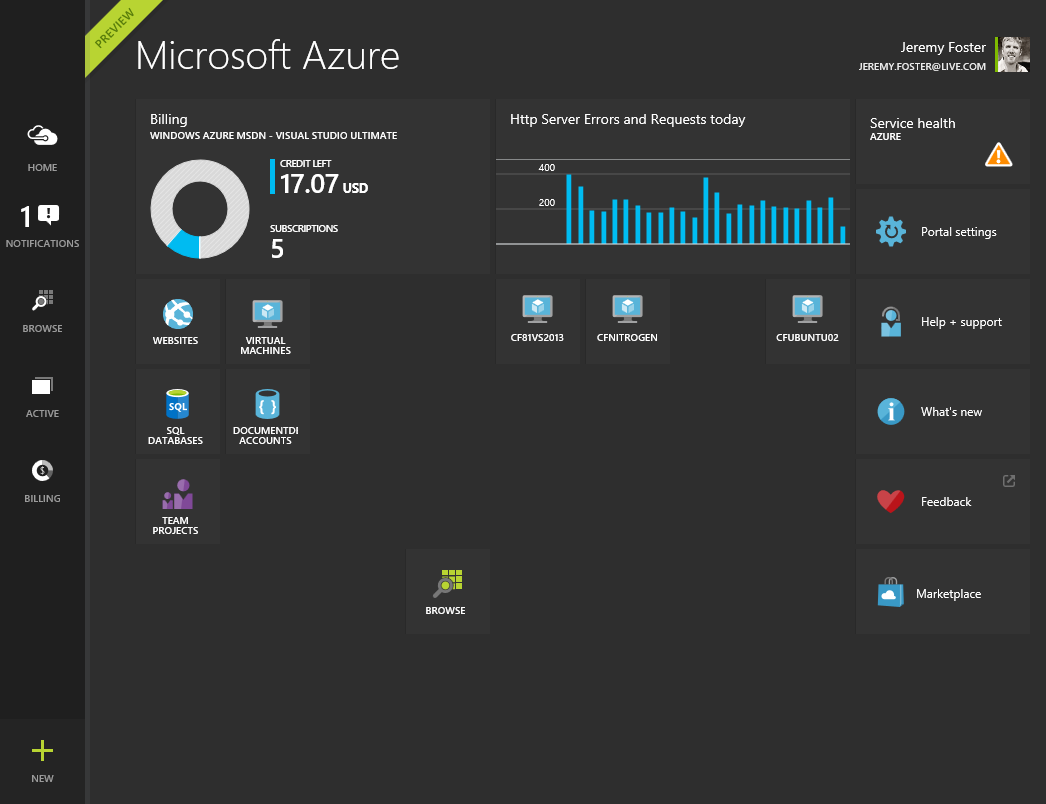
Both of these are works of modern, web art and very functional in my opinion. I love the current portal, and now that I’m accustomed to it, I love the new portal as well.
But I would like to get to the place where I have little to no need for the portals. I would like to instead to be utterly dependent on the command line.
I started some time back on the PowerShell command interface for Azure and it’s very well made. I had a hard time getting to it though. I suppose it was the long commands - the PowerShell syntax. Although it’s quite descriptive and offers good tab completion and documentation, I still found it a chore and kept at my work in the portal.
I had a glance some time ago at the node tooling for Azure as well, but didn’t really give it a fair shake. Now I’m shaking it like crazy and really excited. Check out some of these things you can do…
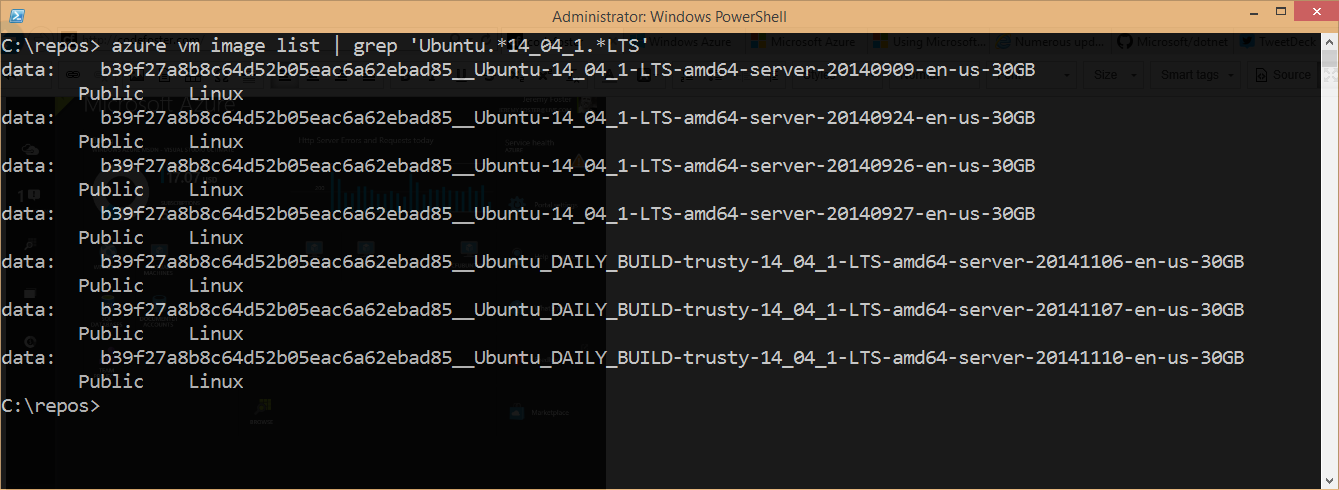
Check out which Ubuntu images I can use for creating a VM…
The following will generate a list of Azure VM images and allows me to pipe to a regular expression to pull out just the stable (LTS) Ubuntu images of a certain version (14.04.1). It’s also possible to add a --json property to the request and get this data back in JSON format.
azure vm image list | grep 'Ubuntu.*14_04_1.*LTS' |
Create an Ubuntu Linux VM from one of those images…
Once I’ve chosen the image I want to start with, I simple call the following to create a new VM in the West US region. I add the -e parameter to add ssh capability so I can ssh into the machine when it’s finished.
azure vm create -l 'West US' VM_NAME b39f27a8b8c64d52b05eac6a62ebad85__Ubuntu_DAILY_BUILD-trusty-14_04_1-LTS-amd64-server-20141110-en-us-30GB codefoster -e |
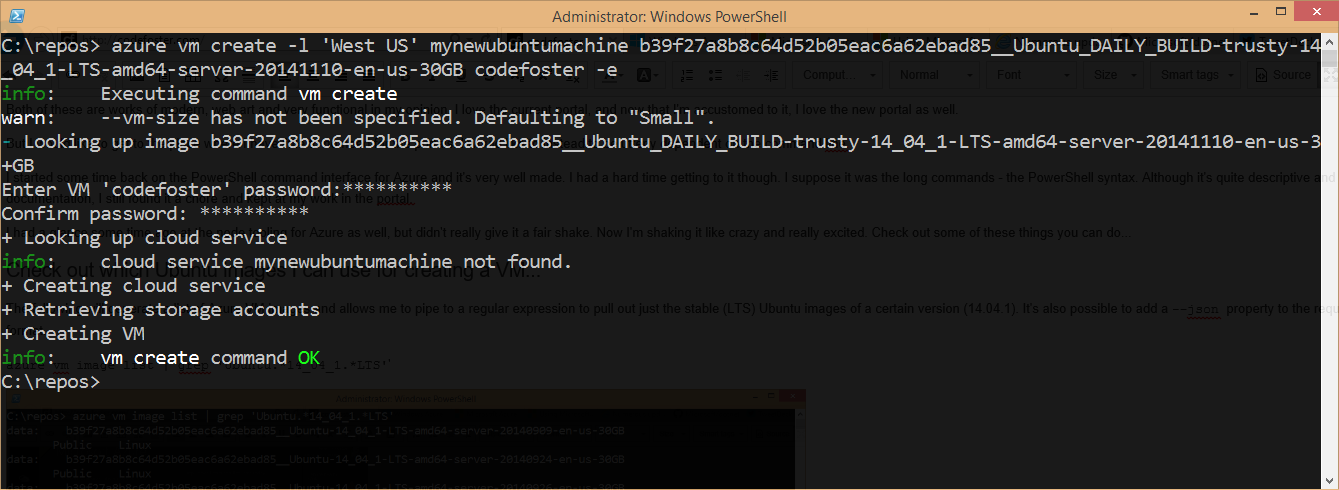
Now let’s fetch a list of my VM’s and see the new mynewubuntumachine in there…
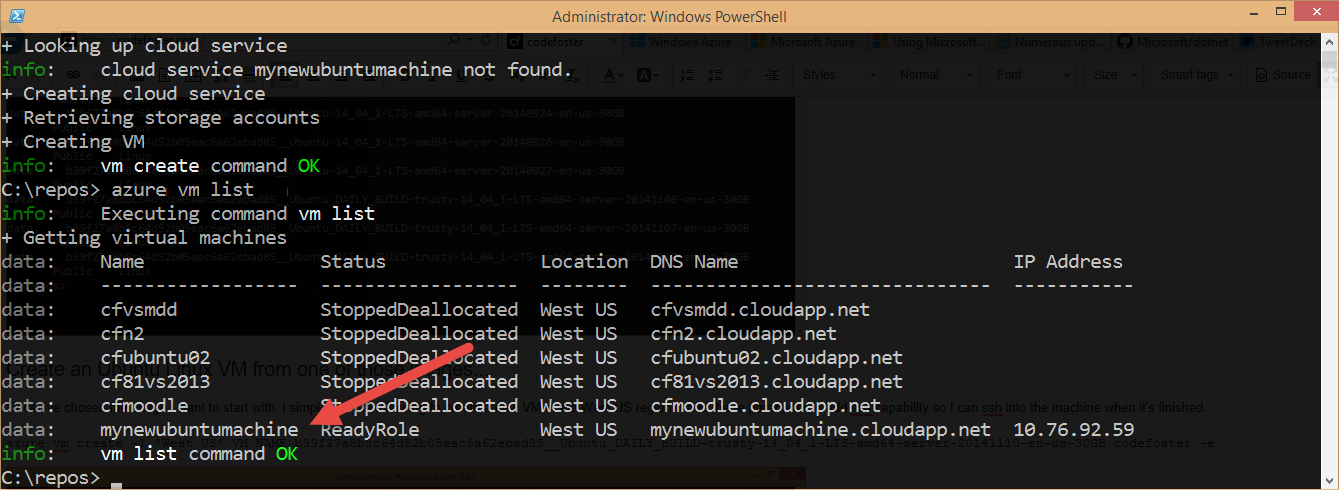
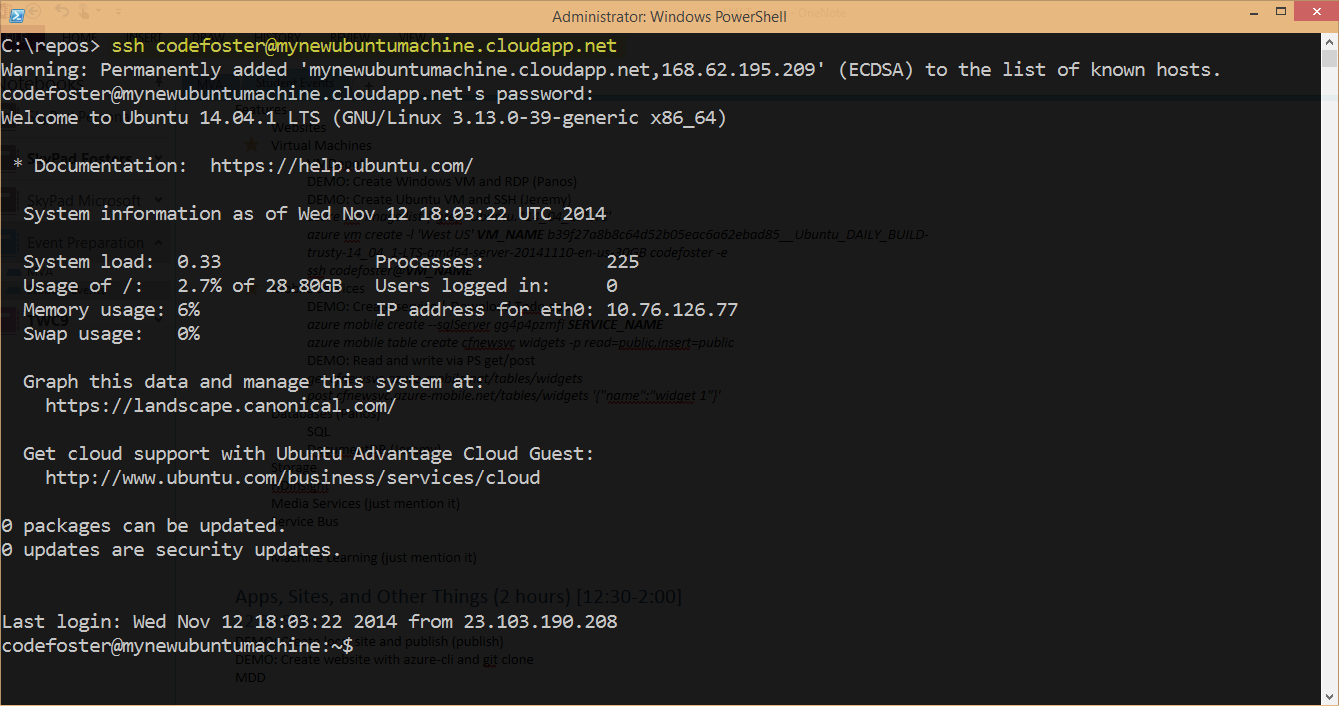
By the way, if you’re like me and like staying in the command line interface, try installing Cygwin. It runs great in PowerShell and allows me immediately after creating this VM to ssh into it like so…
I’d rather that machine not start charging me for compute, so let’s shut it down and make it free (except for a little bit of storage… pennies)…
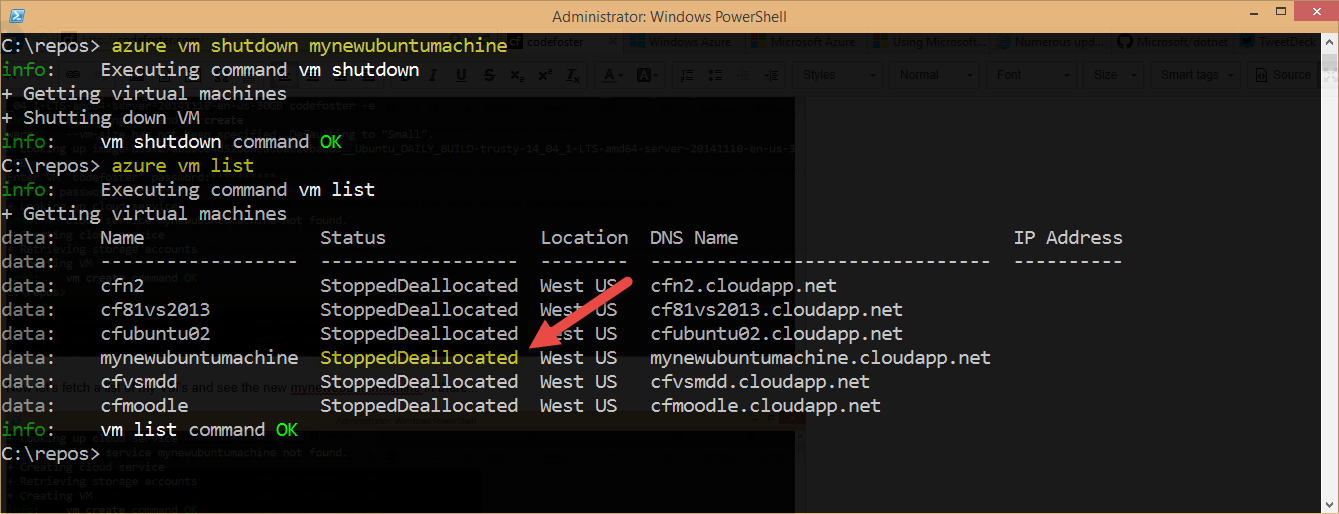
That’s better.
What else can we do with the azure-cli? Oh, man. Glad you asked. Let’s create a quick Azure Mobile Service, add a table, and then use some PowerShell candy to start writing and reading records.
Creating a Mobile Service…
First, we create the service like the following where gg4p4pzmfi is simply the name of my particular SQL Server. I already have it, so I may as well use that instead of creating a new one. My service is actually going to be called “cfms”.
azure mobile create --sqlServer gg4p4pzmfi cfms |

Then we create a table. Let’s just punt and call it widgets. In order to show interactions with the table via simple HTTP commands, I’m going to open up the insert and read permissions so I don’t have to create authentication headers in my HTTP calls…
azure mobile table create cfms widgets -p read=public,insert=public |

And there we have a service with a table ready for us. Now, in case you’ve never noticed, PowerShell natively allows us to use curl to do web requests, but curl is not really installed. Instead it’s a simple alias to the Invoke-WebRequest method in PowerShell. I chose to write the following functions into my PowerShell profile so it’s always available to me…
Function get ($uri) |
So now we can write a record into our new widgets table like so…
post [http://cfms.azure-mobile.net/tables/widgets](http://cfms.azure-mobile.net/tables/widgets) '{"name":"widget 1"}'; |

Do notice that the response we got back from this post included the actual inserted object complete with the GUID that Azure Mobile Services tacked on to it. In case you’re not already familiar with Mobile Services, you should also take note that we didn’t schematize this table when we created it. Instead, we simply created an object with a name property and let Mobile Services handle that for us.
Now, a get from the same table should show us our widget 1 record, and in fact it does…

I love how simple and elegant a solution this is.
There’s obviously a whole lot more we can do with azure-cli that I won’t take the time to detail. But there’s one more thing you should see - the inline help. For any command, simply tack on -h and you will get good information about the various possible parameters you can use. It’s contextual too. If you type azure -h, you’ll see all of the high level options for the azure-cli tool, whereas if you type azure vm -h, you’ll see specific commands for working with VM’s.
The azure -h is great for giving you an overview of what the tool will do.
I hope you have as much fun with this as I have already.
To get started, visit this page to see instructions on installing the tooling.
Blend - Design, Execute, Interact
This is likely apparent to anyone that has already ventured into Windows 8 development using Blend for Visual Studio 11, but if you haven’t ventured in yet for some reason… like say you’re busy actually getting work done! I know how that goes. I was recently in industry trying to meet deadlines and didn’t have much opportunity to look at new technology.
So allow me to quickly highlight an incredible feature in Windows 8 development – specifically in Blend for Visual Studio 11.
Why Use Blend?
First of all, why and when should you open Blend? For a long time, Blend was downright offensive to me as a developer. I was and still am a Visual Studio guy. I don’t want another IDE offering in parallel to confuse and divide me! But now I’ve accepted the two tools as very different and each very powerful in their own role.
Some people will almost always use Visual Studio. Remember that the Express version is completely free. How do you know if you’re one of these people? Simple. Look down. Are you wearing one of these t-shirts right now?

If so then chances are you’re a geek and Visual Studio may be your primary if not your exclusive tool.
Are you wearing something more like this?

If so then you may call Blend your home and ask a geekier friend to write the actual code for you. If you’re like me, you might wear many hats (and shirts) and be able to geek out in the code and the design tools.
Design, Execute, Interact
But right now I want to show you something that is exclusive to Blend. That is its ability to execute your application live as you design it and its ability to even give you interaction with the application and why you need that.
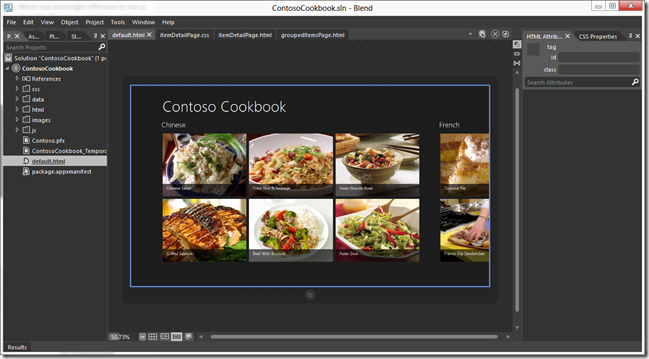
The figure above is what it looks like when you’re designing an application in Blend. The interesting tidbit of note is that those recipes you see in the design pallet are not declared in the HTML. They exist as JavaScript arrays in the data.js file and as images of food (yum) stored in the images folder.
Blend here is executing the application, running the JavaScript, and rendering the recipes accordingly on the screen. So just this is pretty awesome. Remember in Expression Blend days of old when we loaded sample data so we (designer role) could get an idea of what things looked like. Those are bygone days, my friend.
In this mode, we can actually grab one of the images (even though they’re being rendered live!) and resize it (see next figure) - effectively modifying the size of the image element in the item template utilized by the ListView control that forms this list.
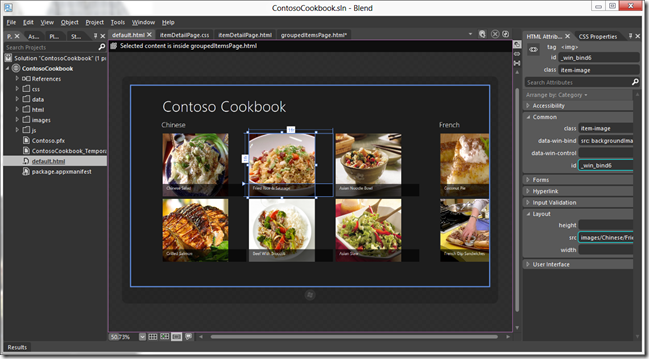
But what about when you want to do some design on a different page. Say we want to resize the recipe image on its detail page as well. If we were actually executing this application, we would touch on the recipe to get to this page. But remember that we are actually executing this application. We just have to tell Blend that we want to interact with it. And to do that you hit the Interactive Mode icon…

…on the right side of the tab well. This hides all of Blend’s panes and puts you in a mode where input is passed on to the application (see next figure).
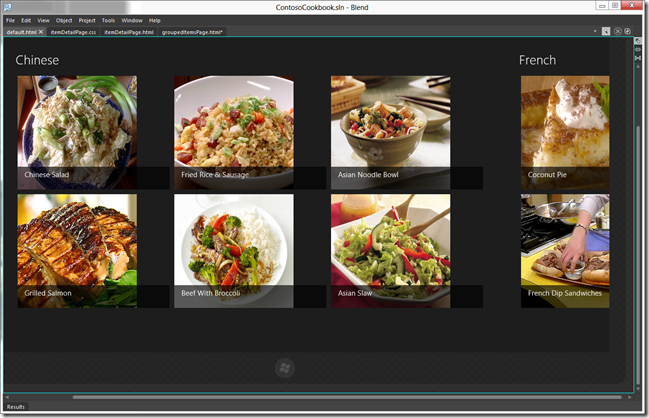
Now a click on a recipe takes you to the item’s detail page…
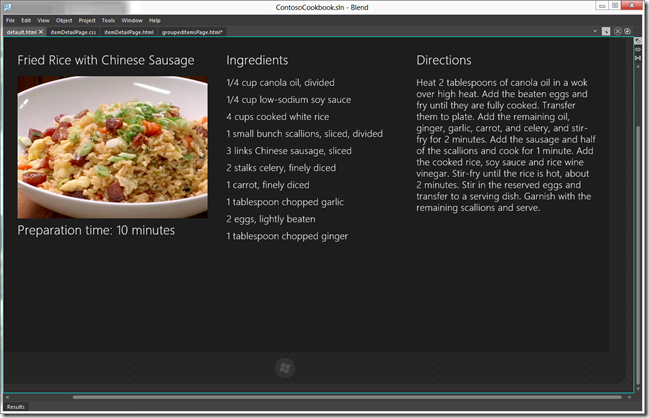
You can now click on the Interactive Mode icon again to turn it off…
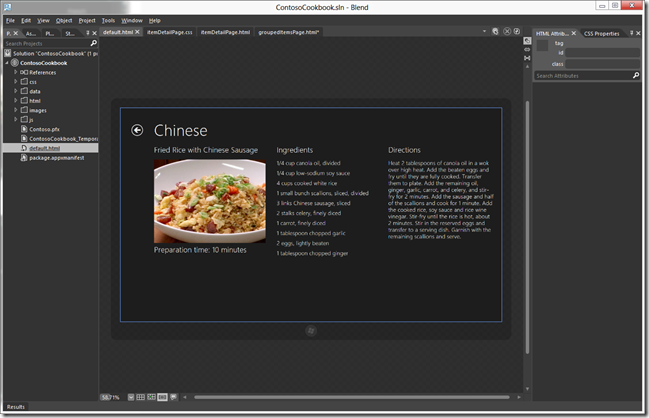
…and now you’re ready to do some design on this page.
That’s all for now. Let the power and potential that is Blend sink deep. Now use it to create an awesome app.
Happy Blending!