Developer Tools
Semantic Selections and Why They Matter
I’m a big fan of at least two things in life: writing code and being productive. On matters involving both I get downright giddy, and one such matter is semantic selection. VS Code calls them smart selections, but whatever.
Semantic selection is overlooked by a lot of developers, but it’s a crying shame to overlook something so helpful. It’s like what comedian Brian Regan says about getting to the eye doctor.
Semantic selection is a way to select the text of your code using the keyboard. Instead of treating every character the same, however, semantic selection uses insights regarding the symbols and other code constructs to (usually) select what you intended to select with far fewer keystrokes.
I used to rely heavily on this feature provided by ReSharper way back when I used heavy IDEs and all ;)
Some may ask why you would depend on the keyboard for making selections when you could just grab the mouse and drag over your characters from start to finish? Well, it’s my strong opinion that going for the mouse in an IDE is pretty much always a compromise - of your values at least but usually of time as well. That journey from keyboard to mouse and back is like a trans-Pacific flight.
I can’t count the number of times I’ve watched over the shoulder as a developer carefully highlighted an entire line of text using the mouse and then jumped back to the keyboard to hit BACKSPACE. Learning the keyboard shortcut for deleting a line of text (
CTRL+SHIFT+Kin VS Code) can shave minutes off your day.
Without features like semantic selection, however, selecting text using the keyboard alone can be arduous. For a long time, we’ve had SHIFT to make selections and CTRL to jump by word, but it’s still time consuming to get your cursor to the start and then to the end of your intended selection.
To fully convey the value of semantic selection, imagine you’re cursor is just after the last n of the currentPerson symbol in this code…
function getPersonData() { |
Now imagine you want change currentPerson to currentContact. With smart selection in VS Code, you would…
- Tap the left arrow one time to get your cursor into the
currentPersonsymbol (instead of on the trailing comma) - Hit
SHIFT+ALT+RIGHT ARROWto expand the selection
Now, notice what got highlighted - just the “Person” part of currentPerson. Smart selection is smart enough to know how camel case variable names work and just grab that. Now simply typing the word Contact will give you what you wanted.
What if you wanted to replace the entire variable name from currentPerson to say nextContact? For that you would simple hit SHIFT+ALT+RIGHT ARROW one more time to expand the selection by one more step. Now the entire variable is highlighted.
One more time to get the entire function signature.
Once more to get the function call.
Once more to get the entire statement on that line and again to get the whole line (which is quite common).
Once more to get the function body.
Once more to get the entire function.
That’s awesome, right?
Integrate this into your routine and shave minutes instead of yaks.
Happy coding!
docs.microsoft.com
News flash. Microsoft is a big company.
It’s people big. I have hundreds of thousands of colleagues.
It’s geography big. We have offices, cloud datacenters and regions, and products around the globe.
It’s facility big. We have many campuses and hundreds of buildings here in the Pacific Northwest and more around the world.
It’s also products and services big. We have hundreds of products, services, platforms, libraries, frameworks, and hardware products by which we attempt to fulfill our mission statement to empower every person and every organization on the planet to achieve more.
As a developer, I think of Microsoft as an ecosystem, and it is increasingly an open ecosystem that provides essential developer tools without locking in the people that are building things. We all hate vendor lock-in.
Sometimes when you’re using a single product, a service, or a framework, it’s easy to get confused or overwhelmed when there are multiple entry points into the documentation, and when you’re talking about a developer ecosystem it’s even worse.
If you’re a developer, then, I want you to know that there’s…
** ONE LINK TO RULE THEM ALL **
…there’s docs.microsoft.com
Here’s what that looks like in your browser…
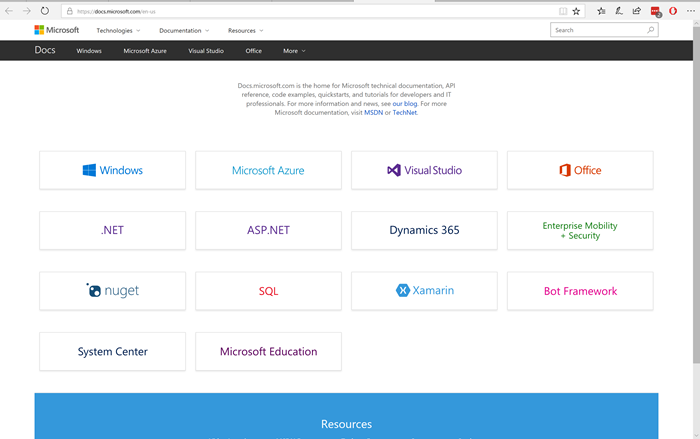
This site is the home for Microsoft technical documentation, API reference, code examples, quickstarts, and tutorials for developers and IT professionals, and it is your single entry point for learning how to consume an Azure service, install Visual Studio, build a Docker image for a .NET Core Application, use the Node.js Driver for SQL Server, interact programmatically with your Azure bill, and loads more.
Are you looking for the Azure Application Architecture Guide. Look no further.
Do you want to get started building a bot? Have at it.
Need the skinny on Authenticating Users with Forms Authentication using Visual Basic? Uh… okay… there you go.
In the past, you may have visited MSDN or TechNet to get the lowdown on how to do what, but going forward, it’s all migrating to Docs.
You should take note too that many of the documentation pages have a header like the following with a date, an indication of average time to read (super helpful), and a list of contributors…
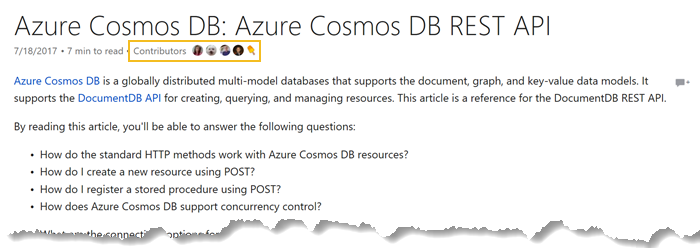
So Microsoft’s documentation, like code itself, is a collaborative effort - an open source project - and in many cases you’re encouraged to contribute! Just look for an Edit link like this one, and you’ll be whisked away to the GitHub repo where you can fork and PR.
Finally, have a glance at the Docs team’s blog to see what’s new. For instance, did you know there’s a new PowerShell Module Browser? Yeah, I didn’t either.
Have fun.
The Azure CLI
At the time of this writing, there are two Azure portals you can use.
To get to the main, full-featured, current Azure portal, you browse to manage.windowsazure.com in any modern browser, and it looks like this…
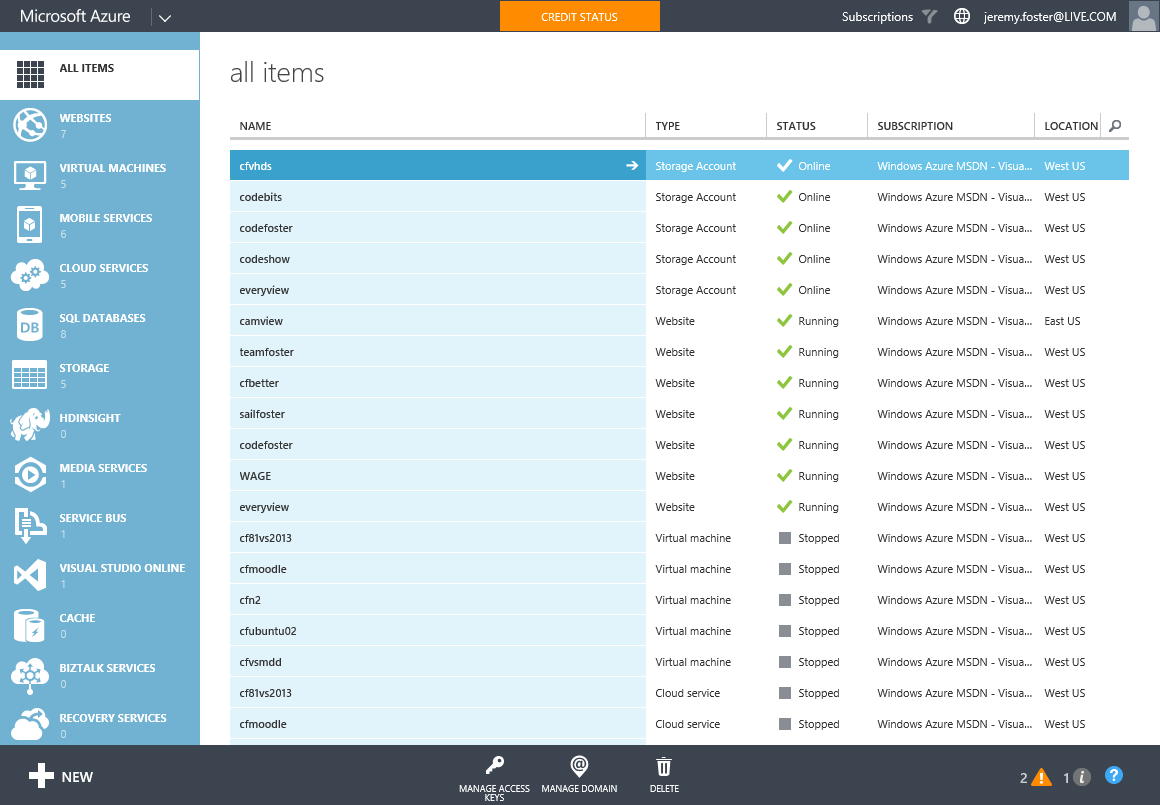
The new portal is already available for you to play with and get familiar with, and it’s a good thing too since it takes quite a bit of getting used to. Once you grok it, though, I’m pretty sure you’ll like it better. You get to the new portal by browsing to portal.azure.com. Here’s what it looks like…
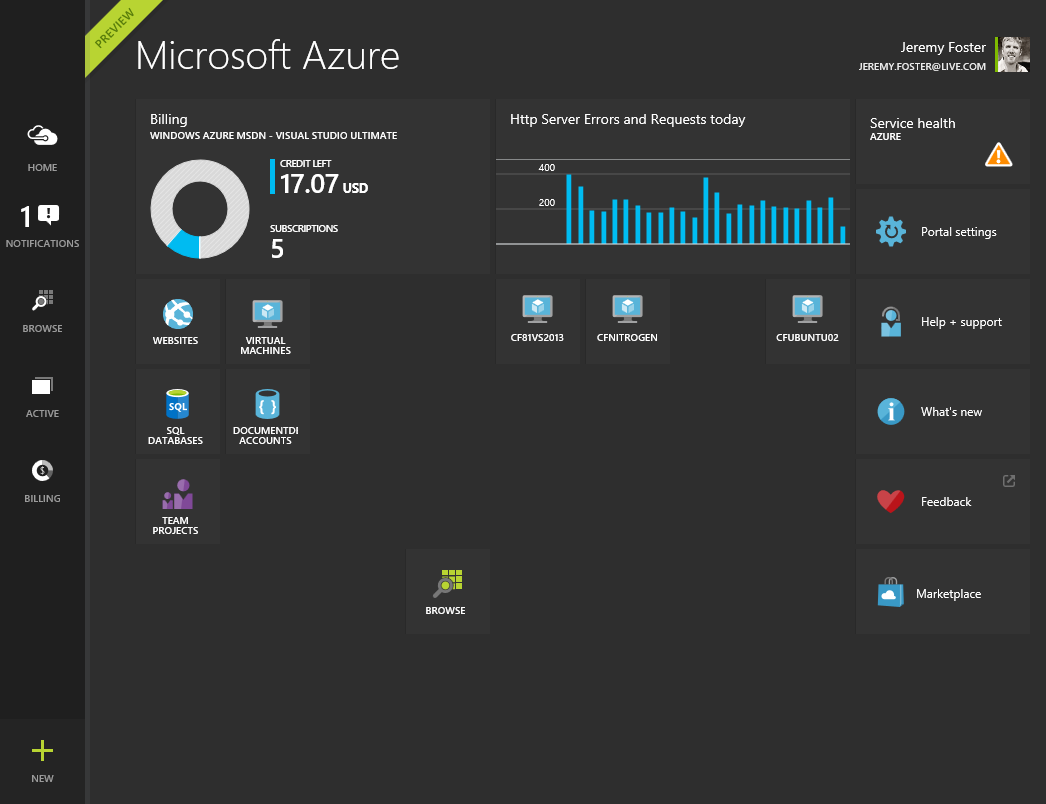
Both of these are works of modern, web art and very functional in my opinion. I love the current portal, and now that I’m accustomed to it, I love the new portal as well.
But I would like to get to the place where I have little to no need for the portals. I would like to instead to be utterly dependent on the command line.
I started some time back on the PowerShell command interface for Azure and it’s very well made. I had a hard time getting to it though. I suppose it was the long commands - the PowerShell syntax. Although it’s quite descriptive and offers good tab completion and documentation, I still found it a chore and kept at my work in the portal.
I had a glance some time ago at the node tooling for Azure as well, but didn’t really give it a fair shake. Now I’m shaking it like crazy and really excited. Check out some of these things you can do…
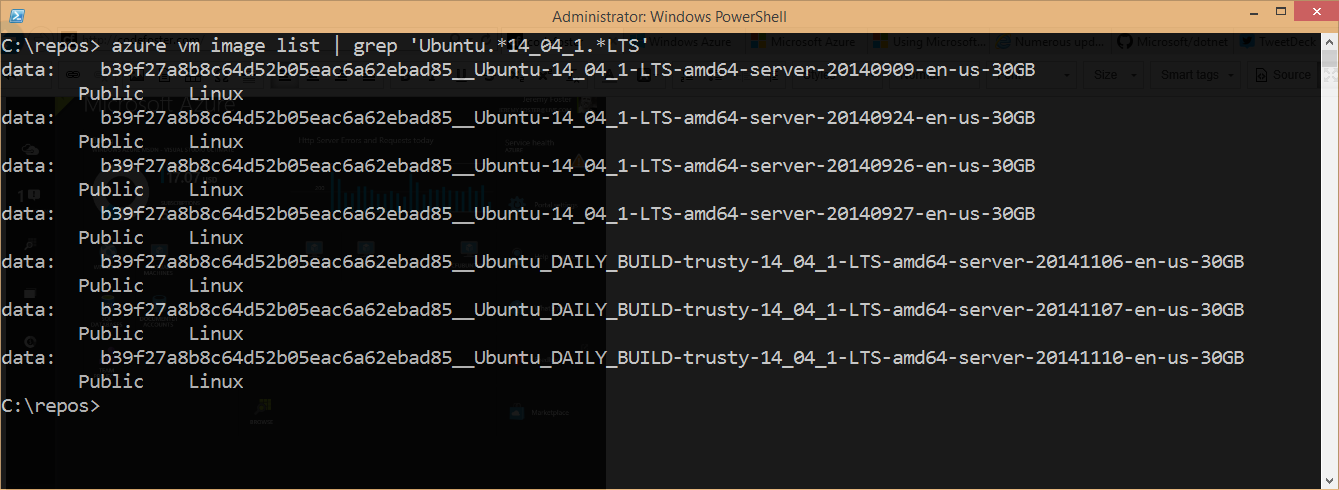
Check out which Ubuntu images I can use for creating a VM…
The following will generate a list of Azure VM images and allows me to pipe to a regular expression to pull out just the stable (LTS) Ubuntu images of a certain version (14.04.1). It’s also possible to add a --json property to the request and get this data back in JSON format.
azure vm image list | grep 'Ubuntu.*14_04_1.*LTS' |
Create an Ubuntu Linux VM from one of those images…
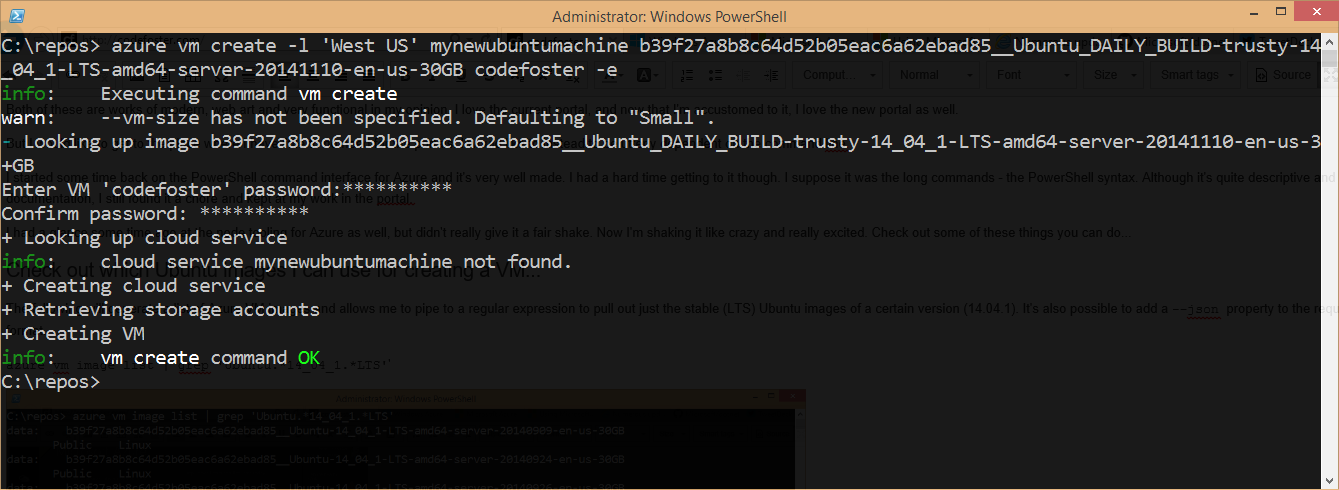
Once I’ve chosen the image I want to start with, I simple call the following to create a new VM in the West US region. I add the -e parameter to add ssh capability so I can ssh into the machine when it’s finished.
azure vm create -l 'West US' VM_NAME b39f27a8b8c64d52b05eac6a62ebad85__Ubuntu_DAILY_BUILD-trusty-14_04_1-LTS-amd64-server-20141110-en-us-30GB codefoster -e |
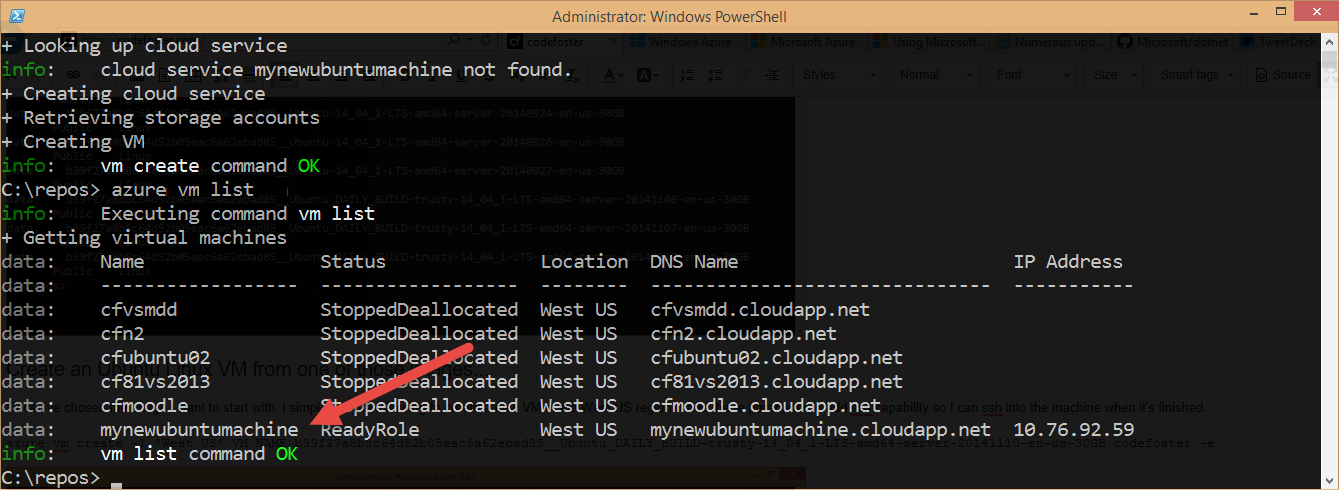
Now let’s fetch a list of my VM’s and see the new mynewubuntumachine in there…
By the way, if you’re like me and like staying in the command line interface, try installing Cygwin. It runs great in PowerShell and allows me immediately after creating this VM to ssh into it like so…
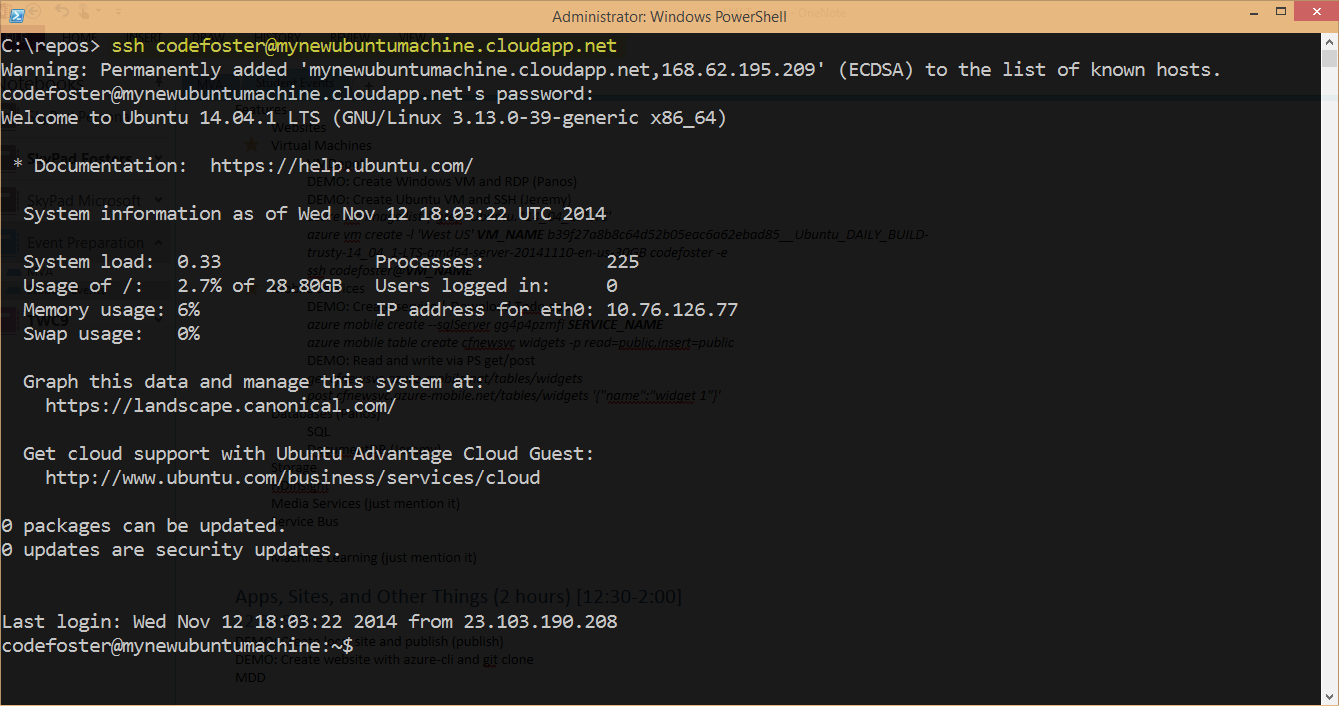
I’d rather that machine not start charging me for compute, so let’s shut it down and make it free (except for a little bit of storage… pennies)…
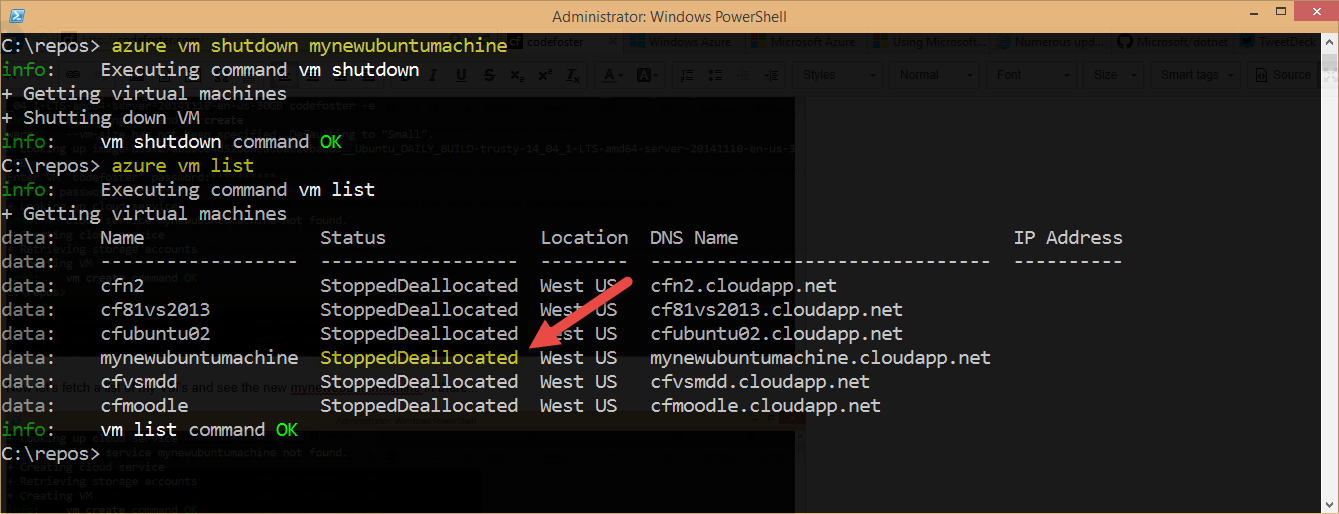
That’s better.
What else can we do with the azure-cli? Oh, man. Glad you asked. Let’s create a quick Azure Mobile Service, add a table, and then use some PowerShell candy to start writing and reading records.
Creating a Mobile Service…
First, we create the service like the following where gg4p4pzmfi is simply the name of my particular SQL Server. I already have it, so I may as well use that instead of creating a new one. My service is actually going to be called “cfms”.
azure mobile create --sqlServer gg4p4pzmfi cfms |

Then we create a table. Let’s just punt and call it widgets. In order to show interactions with the table via simple HTTP commands, I’m going to open up the insert and read permissions so I don’t have to create authentication headers in my HTTP calls…
azure mobile table create cfms widgets -p read=public,insert=public |

And there we have a service with a table ready for us. Now, in case you’ve never noticed, PowerShell natively allows us to use curl to do web requests, but curl is not really installed. Instead it’s a simple alias to the Invoke-WebRequest method in PowerShell. I chose to write the following functions into my PowerShell profile so it’s always available to me…
Function get ($uri) |
So now we can write a record into our new widgets table like so…
post [http://cfms.azure-mobile.net/tables/widgets](http://cfms.azure-mobile.net/tables/widgets) '{"name":"widget 1"}'; |

Do notice that the response we got back from this post included the actual inserted object complete with the GUID that Azure Mobile Services tacked on to it. In case you’re not already familiar with Mobile Services, you should also take note that we didn’t schematize this table when we created it. Instead, we simply created an object with a name property and let Mobile Services handle that for us.
Now, a get from the same table should show us our widget 1 record, and in fact it does…

I love how simple and elegant a solution this is.
There’s obviously a whole lot more we can do with azure-cli that I won’t take the time to detail. But there’s one more thing you should see - the inline help. For any command, simply tack on -h and you will get good information about the various possible parameters you can use. It’s contextual too. If you type azure -h, you’ll see all of the high level options for the azure-cli tool, whereas if you type azure vm -h, you’ll see specific commands for working with VM’s.
The azure -h is great for giving you an overview of what the tool will do.
I hope you have as much fun with this as I have already.
To get started, visit this page to see instructions on installing the tooling.
Fast Refresh... Nugget!
Hey, Metro developers, if you’re using HTML/JS to build your apps, I have a little golden nugget for you. Actually, it’s possible you already know and I’m the one that’s late to the game. Anyway, have you ever made a little tiny tweak to your HTML structure, a slight mod to your CSS style, or a little enhancement to your JavaScript and wanted to see the change effect immediately instead of relaunching your app each time? It’s a valid desire. My last job was website development and so I’m used to the whole save, switch, refresh workflow.

If you’re working without the debugger attached, then you know it’s not that difficult, you just hit CTRL + F5 again.
If you are working with the debugger attached, however, you might think you have to stop (SHIFT + F5) and then start again (F5). Actually, though, all you have to do is hit F4 (Fast Refresh is how we call that)! Now that’s handy!