
Writing JavaScript for an Intel Edison
In my last article about the Intel Edison, I showed you how to take yours out of the box, and get it set up. Consider this article a follow-on. I’m going to pick up pretty much where the last one ended.
We actually wrote a little bit of code in the setup article, so you got a taste. Now we’re going to learn…
- how to use the power of Node.js to bring in libraries and command our device
- how to deploy code to the device wirelessly (zoing!)
- how to use the excellent Cylon library to make our code elegant and expressive
Let’s start off in this article without employing the help of Visual Studio, and then my next article will capture the many productivity benefits of VS. It’s always nice to start at the base and climb up to awesome tooling. That way, we’re thankful for the conveniences it brings. :)
Using Node.js
Installing Node.js
I’m assuming your host PC is Windows. I’m running the technical preview of Windows 10 and it’s all working great. I like to live on the edge.
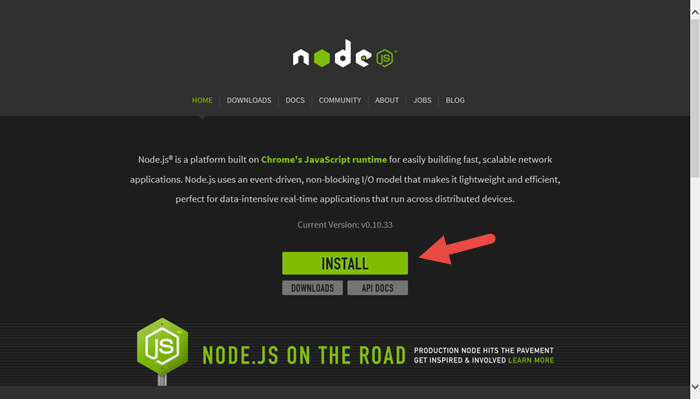
The easiest way to install Node.js is by simply clicking the big green button you’ll find at nodejs.org…
You’ll see in the installation wizard, that you’re actually getting the NPM utility installed along with the Node.js engine. The installation should take care of a lot of busy work for you such as adding node and npm to your path so you can actually call it from the CLI. My CLI of choice, BTW, is PowerShell. To be clear, I’m talking here about installing Node.js on your host PC. Node and NPM should already be installed on the device if you flashed it according to the instructions in the last post.
After you have Node.js installed, we’ll walk through a few steps to create a new node project on your host PC. When we’re done with that, we’ll turn our attention to getting that code over to the Edison and running it there.
Creating the Folder and File Structure
Node.js projects have a pretty well defined, convention based folder and file structure. They’re very simple too - all of the metadata is in one spot. I don’t know where you keep your development projects, but I keep all of mine under c:\repos and I’ll start there. Watch the following video as I create a new project folder, generate an app package description file (package.json), and then create my initial app.js file…
As you can see, the npm init makes the creation of our package.json file very easy. The package.json file describes your node project and has a few purposes - the two most prominent that I can think of are a) it provides the metadata necessary in case we end up publishing this package to the node package store and b) it defines the project dependencies so that when the project is copied somewhere else, a simple command is all that’s necessary to actually go out and copy in all binaries necessary for the app to work.
Writing the Code
Now, in keeping with a simple workflow at first, let’s open app.js in Notepad++, and fill out the following…
var mraa = require('mraa'); |
This code depends on the mraa module, but if you followed my setup guide and flashed the Intel with the latest image, then you already have it. The mraa module maps the C libraries for interacting with the Edison’s hardware (the GPIO pins, the I2C bus, etc.) to Python and to JavaScript.
The code simply creates a new pin out of pin 13. Pin 13 is the one that conveniently has an LED on the dev board, so we don’t even have to plug anything in to see it. It then sets the direction of that pin to out. And finally, it raises the logic level of the pin by writing a value of 1.
Deploying Wirelessly
We saw in the last guide how to SSH directly to our device. If you gave your device the name “betty” like I did, then you’ve been provided a DNS name of betty.local which represents the IP address that your device was assigned on the network. If you’re not sure the device or the DNS name are working, just do ping betty.local from the CLI (replacing ‘betty’ with the name of your device of course). I’ve actually started pinging to discover the IP address and then using the IP address explicitly for SSH and SCP, because it takes a little time for the alias to resolve but hitting the IP address directly is snappy.
First, we’ll get our code copied to the device, and then we’ll SSH to the device in order to execute the code. It is also possible to simply execute the node app.js command remotely with SSH, but it’s fun to see what’s actually happening.
In this video, I’m going to SSH to the device, make a directory for our hellonode app, then jump back to my host machine, copy the files to the device (and specifically to that project folder) using SCP, and then back to the device to execute the app. The workflow can be simplified a bit, but I’m not arguing at this point. It’s pretty wonderful actually.
Notice the syntax of the SCP command. It wants scp
You didn’t see anything happen there, but I did. My LED came on.
There are a few things that are cool about this. It’s cool that the mraa library preexists and makes communicating with the device pins so easy from a high-level language like JavaScript. Also, it’s great that we’re remoting and remote deploying our project wirelessly. This means that we can build something like an intelligent camera device, install it in a bird nest, and then remotely upgrade our software without disturbing the birds. That’s just the first example that came to mind.
Alright, now lets make our development really clean and easy by employing the CylonJS library.
Using CylonJS
CylonJS can be found at cylonjs.com. You won’t even need to go there to get the code, because we’re going to use NPM, but you may want to go check it out to get familiar with the project and eventually to research the documentation for whatever device and driver you’re using.
Let’s run through the steps to do something similar to our hellonode app above, but use the Cylon library.
In this video we will: create a project folder, create our app.js file with some sample code from cylonjs.com that will cause pin 13 to blink, generate a package.json file, install cylon.js via NPM using the --save parameter to add it as a dependency in our package.json file, then we’ll deploy to the device, and finally SSH to the device and execute the node program. You’ll actually see a video of the device with the LED blinking. Just a quick warning - we’re not only going to be holding off on Visual Studio at this point, but I’ve decided to use a CLI text editor for the hilarious factor as well as the convenience of showing everything in one window. I actually really like using the command line, but GUI’s are great too. As long as I don’t have to remove my hands from my keyboard, I’m a happy programmer.
EDIT: Thanks to Roberto Cervantes in the comments for pointing out a step that I should have called special attention to. In the following video, notice that after I
scpthe files to the device and thensshto the device, I execute the commandnpm install. This looks into thepackage.jsonfile that we just deployed to see what my project’s dependencies are, it goes out to the internet (to the NPM repository) to fetch the packages, and then it installs them. If you skip this step your app will have no idea whatrequire('cylon')means.
A few things to note about this video…
My
edit app.jscommand won’t work for you because that’s a special command line text editor that I use. I’m going to go ahead and assume you have your own favorite way to edit a text file. :)Note that installing the
cylon-intel-iotmodule added dependencies in the package.json for itself as well as for its dependencies. We actually never had to create thecylonmodule as a dependency. That happened implicitly because the cylon-intel-iot module knew that it needed it. That’s a cool thing about node modules - they each know exactly what they depend on and a singleinstallcommand recursively takes care of business.We copied over only the app.js and the package.json. We did not copy over the node_modules folder - you’ll notice that I deleted it before deploying. This is the right way to deploy project. You don’t check the
node_modulesin to source control and don’t copy it over in a deployment. Instead, you rely on the dependencies defined in your package.json file. On the deployment server, you executenpm installand if anything doesn’t get installed correctly, then you need to add it to yourpackage.jsonfile.
And now a bit about the CylonJS code. Here it is…
var Cylon = require('cylon'); |
Just like in our simpler hellonode app, we are doing a require right off the bat here. We are not, however, requiring the mraa library. Instead we’re requiring the cylon module. The cylon-intel-iot module will be invoked from within cylon and it will make calls to the mraa library. We risen up one layer of abstraction. The big benefit here is that we’re no longer writing device specific code. We could theoretically switch our Edison out for a Spark and it would just work.
The code block is, I admit, unnecessarily heavy if you’re just blinking a light, but ponder for a minute the elegance of this compared to the inevitable mass of imperative code that would occur were we doing anything more complicated.
There are a couple of Cylon terms that I should explicitly call out…
A Cylon robot is the device - the Edison or Beaglebone or Spheo or Tessel or any the other 32 or so devices that Cylon already has adaptors for. You define your robot with a connection and you use an adaptor (in the example it’s intel-iot).
A device in Cylon parlance is more like a component on the device. In our example above, the pin is a component and so it’s registered as a device. The important part of the device declaration is the driver. A driver is the interface that Cylon will use to interact with it. When the led driver is used, then the thing we’re calling led will have functions like .turnOn() and .turnOff(). This makes it so that our we only ever speak to our components with sensible language - you tell a servo motor .clockwise() and you capture a button press with .on('push',function(){}). Sensible is good in my book.
Besides declaring the connections and devices, we declare a function that is to run when the robot is finished with its setup. In this case, we’re using the built-in every function provided by the Cylon library to toggle the led every second. Easy peasy.
Well, folks, there you have it. This is the point in my learning that I felt like the gate was open and I was running free and wild. Oh, the myriad of devices to communicate with. Oh, the plethora of components. Oh, the possibilities.
I have a few more posts to write on this, but I’m keeping them all separate so I can get them out the door. All of these articles are indexed at codefoster.com/edison.
Please feel free to comment below if you have any trouble here. There’s a good chance I ran into the trouble you’re finding, and if I didn’t I’m willing to bang my head against the wall a bit with you - just a bit.