Easy and Offline Connection to your Raspberry Pi
Getting a Raspberry Pi online is really easy if you have an HDMI monitor, keyboard, and mouse.
Subsequently getting an SSH connection to your pi is easy if you have a home router with internet access that you’re both (your PC and your pi) connected to.
But let’s say you’re on an airplane and you pull your Raspberry Pi out of its box and you want to get set up. We call that provisioning. How would you do that?
I’ll propose my method.
First, you need to plug your pi into your PC using an ethernet cable. If you’re a technologist of old like I am, you may be rummaging through your stash for a crossover cable at this point. It turns out that’s not necessary though. I was pretty interested to discover that modern networking hardware has auto-detection that is able to determine that you have a network adapter plugged directly into another network adapter and crosses it over for you. This means I only have to carry one ethernet cable in my go bag. Nice.
If you put a new OS image on your pi and boot it up, it already detects and supports the ethernet NIC, so it should get connected and get an IP automatically.
Here comes the seemingly difficult part. How do you determine what the IP address of your pi is if you don’t have a screen?
The great thing is that the pi will tell you if you know how to listen.
The means by which you listen is called mDNS. mDNS (Multicast DNS) resolves host names to IP addresses within small networks that do not have a local name server. You may also hear mDNS called zero configuration and Apple implemented it and felt compelled (as they tend to) to rename it - they call it Bonjour.
This service is included by default on the Raspberry Pi’s base build of Raspbian, and what it means is that out of the box, the pi is broadcasting its IP address.
To access it, however, you also need mDNS installed on your system. The easiest way I am aware of to do this is to download and install Apple’s Bonjour Print Services for Windows. I’m not certain, but I believe if you have a Mac this service is already there.
Once you have mDNS capability, you simply…
ping raspberrypi.local -4The name raspberrypi is there because that’s the default hostname of a Raspberry Pi. I like to change the hostname of my devices so I can distinguish one from another, but out of the box, your pi will be called raspberrypi. The .local is there because that’s the way mDNS works. And finally, the -4 is an argument that specifically requests the IPv4 address.
If everything works as expected you’ll see something like…
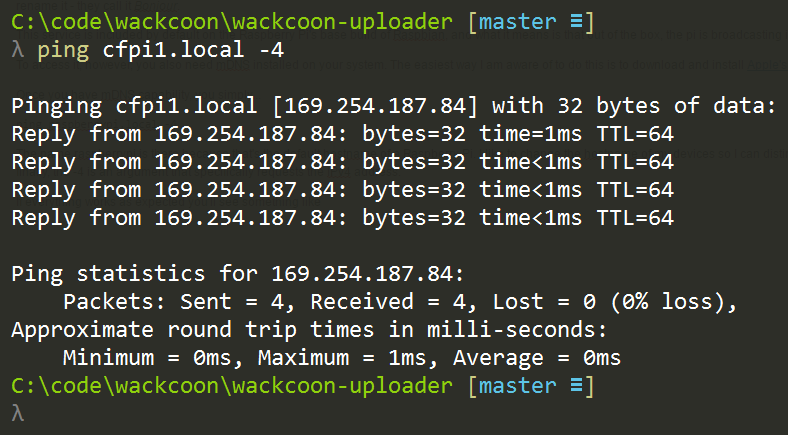
Again, my pi has been renamed to cfpi1, but yours should be called raspberrypi if it’s new.
My system uses 192.168.1.X addresses for my wireless adapter and 169.254.X.X for my ethernet adapter.
So that’s the information I needed. I can now SSH to the device using…
ssh pi@169.254.187.84I could just use ssh pi@raspberrypi.local to remote to it, but I’ve found that continuing to force this local name resolution comes with a little time cost, so it’s sometimes significantly faster to hit the IP address directly. I only use the mDNS to discover the IP and then I use the IP after that.
Provisioning a Raspberry Pi usually includes a number of system configuration steps too. You need to connect it to wireless, set the locale and keyboard language, and maybe turn on services like the camera. If you’re used to doing this through the Raspbian Configuration in XWindows, fear not. You can also do this from the command line using…
sudo raspi-configurationMost everything you need is in there.
You may also be wanting to tell your pi about your wifi router so it’s able to connect to via wireless the next time you boot up. For that, check out my post at codefoster.com/pi-wifi. Actually, if you’re playing a lot with the Raspberry Pi, you might want to visit codefoster.com/pi and see all of the posts I’ve written on the device.
Happy hacking!